In my last post, I showed you a cape that I made. It's reversible, with khaki on one side and white on the other. There's one set of buttonholes, and then you put buttons on both sides of the garment.
At first, I just lined up the buttons back to back on either side of the garment and sewed straight through one and then the other, and back. The end result was that the button areas were stiff as could be. You've probably not thought much about it, but in order to button something, you need to be able to bend the button away from the fabric a bit. I couldn't do this because each button was in the way of the other button.
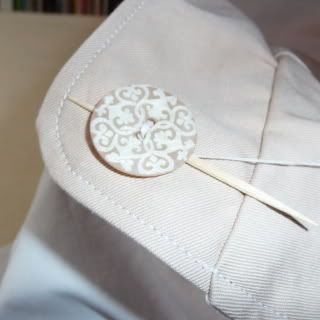
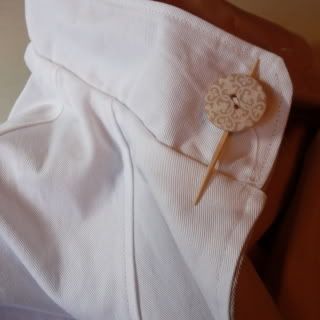
I took the buttons off and added a shank. Doing this is quite simple. You simply place a toothpick between the button and the fabric and then sew on as normal. At the end, your remove the toothpick and your button has a little give.
1. Find where you want your buttons. Place one button with the toothpick between it and the fabric and sew a couple times around to secure it.
2. Add the second button behind it with toothpick, and start sewing 'round and 'round -- through button one, straight through fabric and button two.
3. When you're done, take the needle behind one button, so it's between the button and the fabric and start circling the thread around the inside of the button and behind the toothpick. Essentially, you're wrapping the thread that you used to sew the button on. You're just giving it a little strength. I gave it about four wraps. Now go through to the same place on the other side and repeat. Knot and cut thread.
4. Pull toothpicks out.


3 comments:
I never would have thought of that. Great button, btw. Local source??
I just got them at JoAnn Fabrics, actually. There's a yarn store here that has a great selection of unique buttons, but I always forget when I need them, or I'm too lazy to drive there.
This is so helpful!!!! I just sewed up a couple of reversible dresses and now started to add the buttons. I did one and wanted to check the placement and just like you said there was no room between the two buttons. This will help so much.....now to get crackin....
Post a Comment