
All my secrets, right here. Oh, alright. So this style of handbag is pretty basic. I didn't invent it. It's a common pattern type, but these are the steps I take to make this bag. I thought it would be the easiest bag for a good tutorial.
This is the Karen style bag. First off, please excuse my ugly ironing board. Every time water drips on it, it turns brown.
TIPS: Set your iron to high steam (except for the interfacing -- many of those need a dry iron to stick).
Don't worry if every bit of fabric isn't perfectly cut. It doesn't really matter.
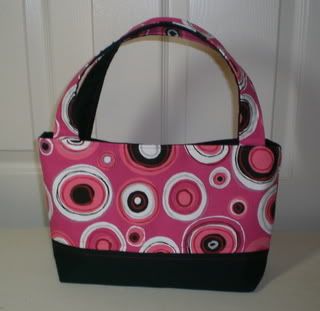
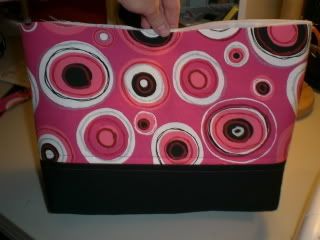
This is the bag we're making. There are a lot of photos on here:
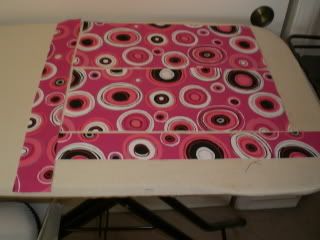
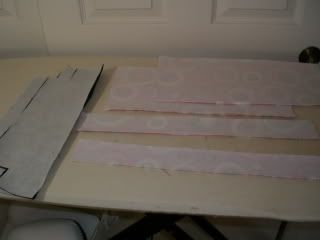
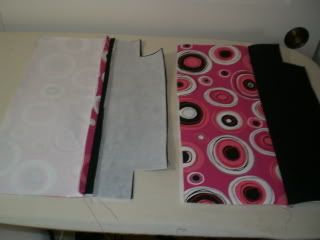
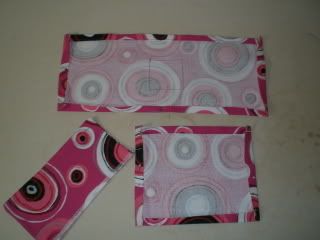
1. Assemble all of your pieces.
I'm not going to go into measurements. Here are the basic shapes. You'll see how they fit together as we go.
 Outer pieces and outer straps
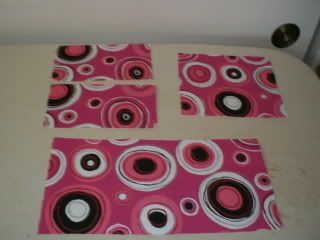 Pockets
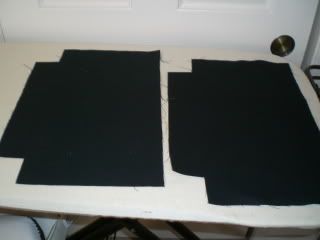 Lining
 Outer bottom contrast and bottom of straps
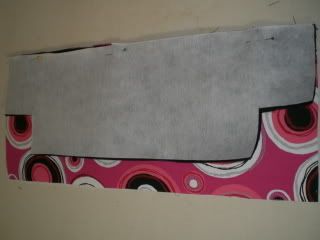
2. Iron heavy, fusible interfacing onto wrong sides of outer pieces and top of straps.
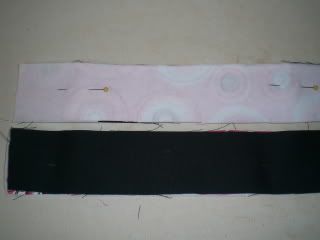
3. Pin right sides of straps together. I have the pink fabric for the top of the straps and the black for the bottom. Interfacing is ironed to top of strap. Here is one strap shown from the top, one from the other side.
4. Pin and sew top outer piece to bottom outer piece by placing right sides together:
 Pinned
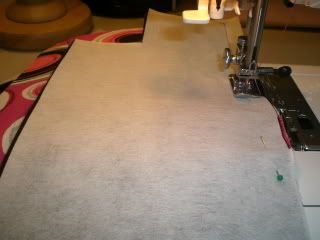 Sewing
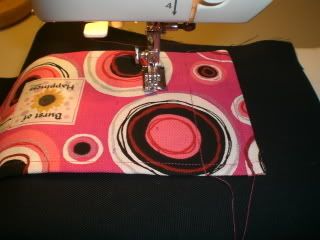
Now, iron the seam flat from the inside and then topstitch from the outside. This gives it a nicer, more professional look:
 Pressed, both sides shown
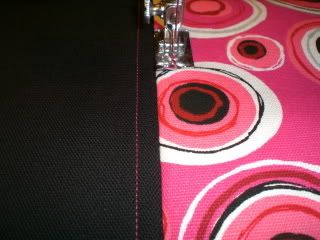 Topstitching
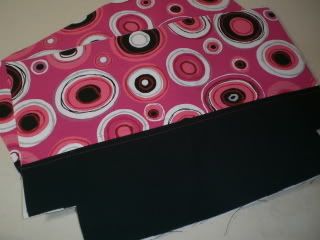 Outer pieces.
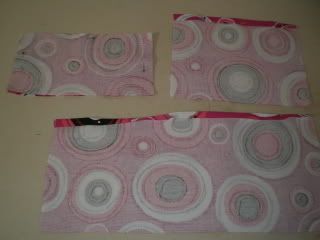
5. Prepare pockets:
Fold over upper edge and press. Then fold again and press. Top stitch top seam of pockets. The smaller one is going to be a pocket with a flap and the big one will be a divided pocket. The flap (top left) is sewn on three sides (it's two pieces, right sides together).
 Folding tops and pressing
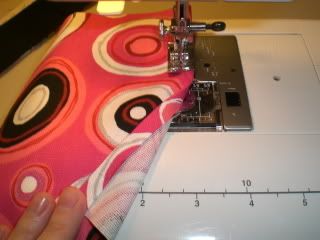 Topstitching pocket tops
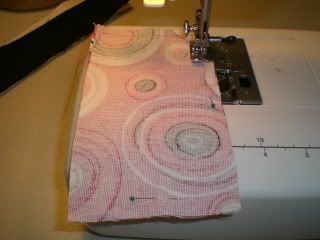 Sewing around three sides of flap
6. Prepare straps:
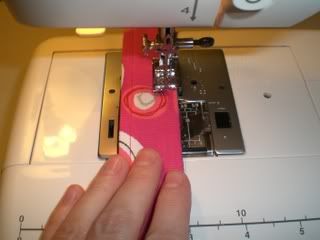
Sew each strap on both sides. I find it better to sew on the side with the interfacing because it feeds more evenly. Sometimes if you sew on the other side, it will bunch up.
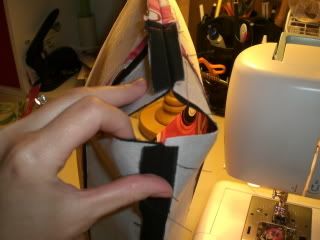
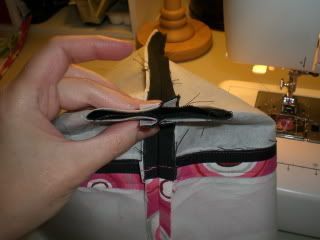
Then attach a safety pin (I put it on the interfaced side because there's less chance of it ripping through the end of the fabric when you've got it only halfway turned) and turn the strap inside out by scrunching up along the pin inside and then pushing the scrunched part to the bottom and turning it in. Do this just a little at a time or else you end up with a big wad at the bottom that won't turn.
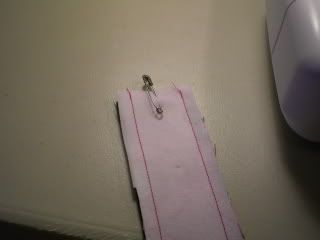 Safety pin in
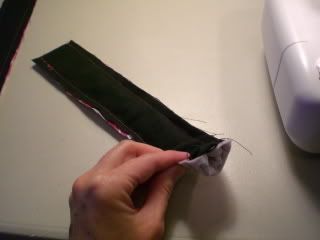 Halfway turned
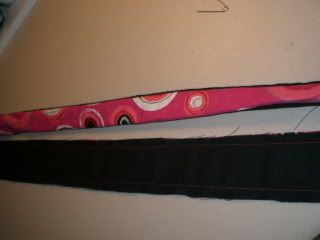 One done, one not
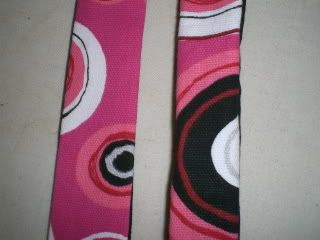 One pressed, one just after turning.
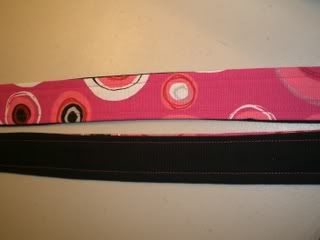
As you can see, it's a bit ugly right after it's turned right-side out. But a bit of pressing makes it look much better.
Then, to make it look totally fab, topstitch:
7. Back to pockets:
After I stitch the pocket flap, I turn it right-side out, press and topstitch. Then I serge the open edge:
8. Let's take a short visit to hell and back.
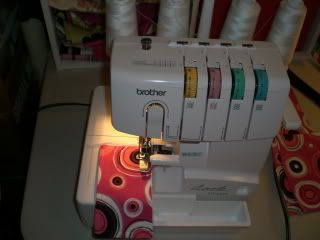
What's the difference between these two pictures?:
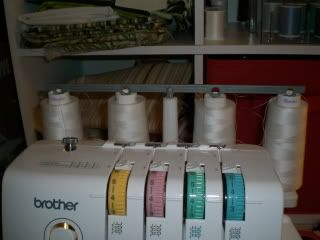
The difference is the thread tree is down against the thread in the first one and properly extended in the second one. The fact that it was down is a very big deal. It means that the thread breaks when you use the serger.
Question: What is the worst thing that can happen to a person? You might say such things as famine, nuclear war, murder ...
But you're wrong. It's when your serger has to be rethreaded.
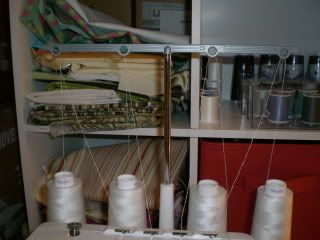
Pull back the front panel and you get this nasty mess:

I spent a good 45 minutes trying to get it rethreaded and chaining again. It just kept breaking. The key is that you have to thread in a certain order, so if thread number 3 breaks, you have to cut the threads to 1 and 2, rethread 3 and the rethread 1 and 2 again. I didn't do this for about 40 minutes and it just kept breaking again and again.
9. Back to pockets.
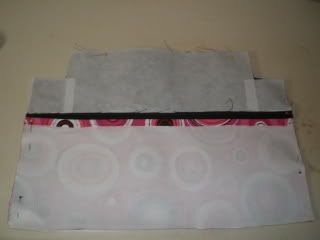
Now that the tops are sewn, fold under the bottoms and sides and press. Then pin them to the lining pieces and sew around the sides and bottom.
 The pieces
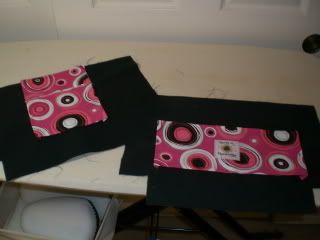 Pinned to lining
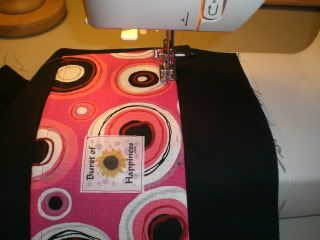 Sewing ...
Now it's time for the dividers. I measure and mark three 1-inch intervals and sew lines. This makes the pen holders. Then I divide the rest of the pocket in half and sew a line to make phone, iPod holders.
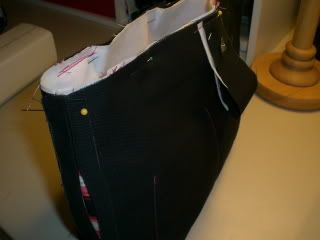
10. It's time to sew the outer bag together. Place the outer pieces right sides together. It's very important that the seam where the pink and black come together matches on each side or else you'll have an uneven line where they meet on the sides of the bag. I start matching and pinning at this point and move outward.
 Pin right sides together
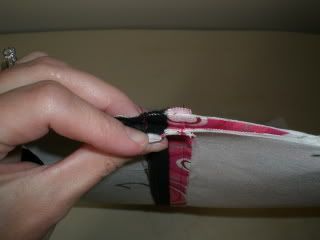 Match the seams!
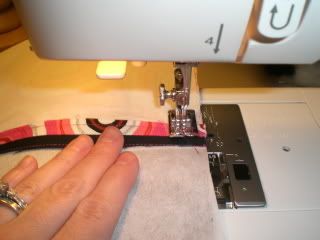 Sew sides and bottom. Ignore the little cut-out squares for now.
Now it's time to shape it. This is where the little cut-out corners come in. First, I press open the seams a little. Then what you have this:
Squish it together and flatten the corner down so that the bottom seam and side seams are parallel. Here, the seam on top is the bottom seam and the seam underneath is the side seam:
Now, sew parallel to the small edge of the cutout:
You end up with this. This is the bottom of the bag sticking up, wrong side out:
Now turn it right side out. It's coming along!:
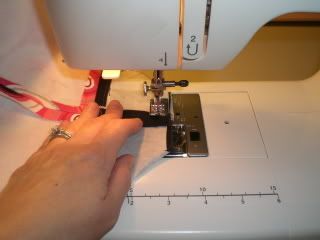
11. It's time to attach the straps. The straps are already done. Now measure a bit from each side and pin the straps on. Keep in mind that you want right sides together. Since I want the pink side of my straps to face upward, I pin the pink side against the right side of the bag. You want your straps hanging toward the bottom of the bag. Now stitch close to the edge. You don't want this stitching to show when you finish the bag, so it needs to be within the seam allowance. I use 1/2" seam allowances. I stitch a bunch of times back and forth to make the straps more sturdy.
 Sewing the handles on
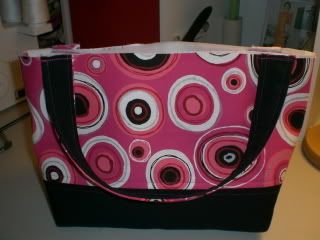 End result -- black side faces up now, but won't in the end.
12. OK, here's my least favorite part: attaching the magnetic snaps. I find that even with a piece of interfacing on the wrong side of the fabric, the stress of pulling the snap apart again and again is too much. So, in addition to a scrap of interfacing behind the snap, I also cut out a scrap of fabric, fold it in half so it's a double layer and sew it to the seam allowance. I then put the prongs of the snap through all four layers: the lining fabric, the interfacing on the back of the lining fabric, and both layers of the sewn-on scrap:
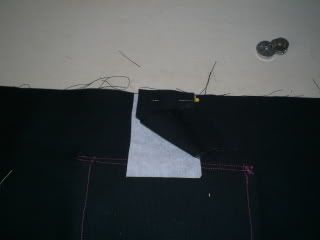 This is from the wrong side of the lining. I have folded back the scrap so you can see the layers.
Then, from the front, I press in with the snap and make little indentations. I then use a marking pencil or pen to mark where the holes need to go. Make a little snip and insert the snap. Here, you might be able to see where I made marks a tad lower and then tried to erase them. I should have kept my snap in the lower location because if it's too high up, once you sew the lining to the outer bag and turn it, when you try to topstitch you may run into the snap. This is what happened to me with this bag and I had to remove all my topstitching and redo it closer to the edge. Keep this in mind when placing your snap.

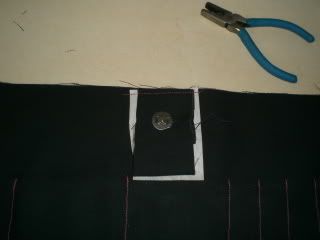 Finished snap, from the wrong side. You push the prongs through, then put the little flat piece over them and bend the prongs. I use a little tool, shown at the top, because they are sort of hard to do with just your hands.
13. Now, sew the lining pieces together in the same way as the outer bag, but leave a hole to turn it through.
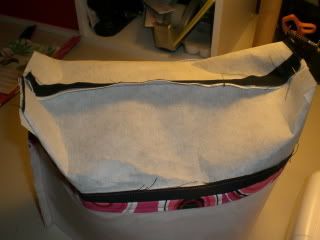
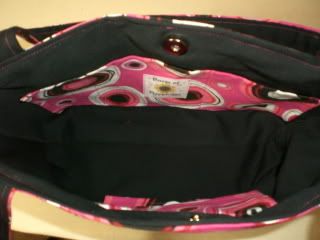
Here is the lining of the bag, wrong side out. It will stay this way. You can see the hole that I left. You can't forget this hole!!!
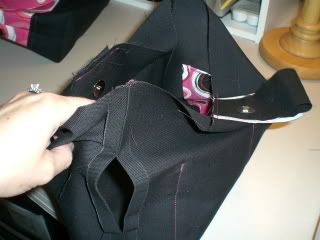
14. Sew the lining and outer bag together.
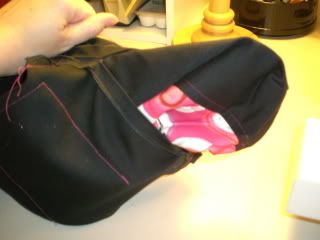
Here, it can get confusing the first time you do it: Place the outer bag, right side out INSIDE the lining, which is wrong side out. You want the straps to be facing downward and between the lining and outer bag at this time. Pin along the top. Anything sticking out of the top at this time will be stuck INSIDE the bag between the lining and outer bag, i.e. misplaced handles. The inside-out, right-side out, backwards, forwards logic can get confusing here at first.
 Pinned
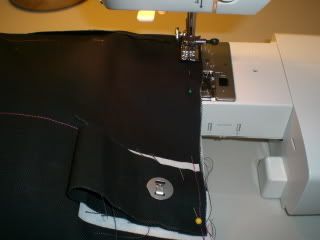 Sewing
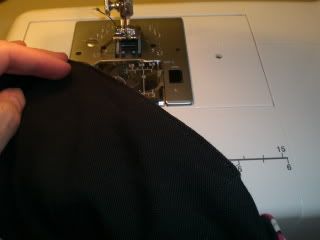
And turn right side out through the hole:
15. Now you need to close that hole up. If you want to do this invisibly, you have to hand stitch it with a slip stitch. I hate hand stitching and usually do a more obvious machine stitch. In this case, I waited until I was completely done with the bag because I needed to change thread from pink to black. It's hard to see what this picture is. It's the hole in the lining stitched close to the edge from the right side.
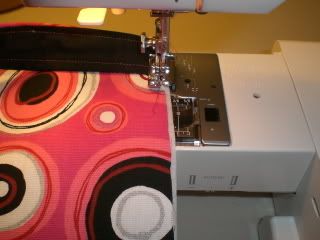
16. The next step is to topstitch the top of the bag. This holds the lining in place and also gives a more professional appearance. Despite taking a gazillion pictures for this tutorial, I couldn't find any of this step. Basically, push the lining into the bag and smooth around the top, pushing the lining to the correct side and pinning around the top. Press to keep in place. Then topstitch around the upper edge, no more than about 2/8". At this point, your straps should be facing UP and away from the bag, otherwise you would topstitch them down against the bag.
17. Press, press, press! A pressing ham helps you get the outer bag 1 side at a time without squishing the bag.

Here's the finished product, inside and out!
Let me know if there's anything confusing in here that I could clarify!
8 comments:
This is FANTASTIC! I am making a bag for a coworker who's leaving, and I've been brainstorming and looking everywhere for the right bag. This is perfect!
Thanks!
P.S. I found your blog via Craftster.
pressing ham....yum!
Hi,
We have recently launched a {designer handbag | designer watches | designer
jewellery } (choose one which is most appropriate) blog and we are looking
to spread the word and get in contact with similar websites to ours to
promote relevant blogs and websites.
Please email me at chriss714@gmail.com
Thanks
Chris
do you by any chance have the measurements for this bag. I tried making it but it just didn't turn out right. Would the measurements be the same as for the new tutorial you've posted??
Thanks a million!
Beth -- I no longer have this exact bag, but the style of bag has a finished measurement of 10" long at the bottom, 13" long at the top, 7.5" tall and 4" deep. I use a half-inch seam allowance.
Look at the shape of the pattern pieces and then make the main piece 13.5" wide and 8" tall, with little cut-out squares at the bottom -- I think they are 1.5"x1.5".
The lining would be the exact same.
You can email me through my Web site for more info: www.burstofhappiness.com.
thanx for the tutorial
great bag
nice day
Thanks for those tutorials. I'll try to make one of these. Nice bags!
cute cute cute!!! thank you!!!!
Post a Comment