
Showing posts with label painting. Show all posts
Showing posts with label painting. Show all posts
Sunday, October 5, 2008
Done!
Finally! After months of painting, our home is finished. First, the painter who flaked out repeatedly. Next, us doing it ourselves -- it was so much miserable work. And then this past three days a (dependable) painter came and finished the job in the high parts we couldn't reach. It looks wonderful, but no pictures till I get a chance to hang art and put everything back where it goes.


Friday, August 15, 2008
5 ... long ... days ... later
We finally finished painting the master bedroom and bathroom. It took five days, but I love how it came out. Reasons it sucked to paint this area of the house:
1. rounded corners, which makes changing colors hard because you have to create a clean line somehow.
2. lots of weird little walls and surfaces, requiring triple the detail work
3. one open space, so we used the same colors, but we needed both semigloss and eggshell versions, which meant we were working with lots and lots of buckets
4. Mark had never painted anything before in his life
The colors we used were by Behr, and they are "Firebrick" (rust), "Caramel sundae" (tan) and "Warm cocoon" (yellow/creamy color)
First, here is what I'm talking about with the bullnose corners. I wanted to change colors here, but there was no good stop point. What I did was tape a line and paint the first color. I tried to seal the tape as much as possible. I found that if you take a hard object like a flathead screwdriver and really run it over the edge of the tape, it helps get it in the nooks and crannies. Then I painted color No. 1. Later, after that dried, I taped over it and painted color No. 2. When the tape came off, it still bled, like this:
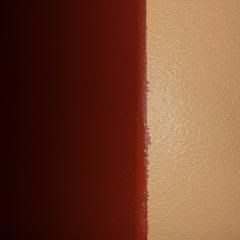
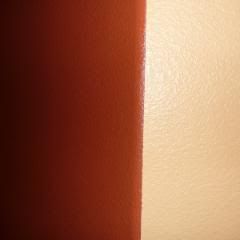
So I then took a brush and color No. 1 and very carefully and with a muy steady hand touched up my line. It came out surprisingly well:
If all else failed, I had planned to order this blending tool.
I also found this edger tool to be a lifesaver. It made great edges in a fraction of the time. It's good for the edge where the wall and the ceiling meet, but also for other places, like where a tan wall intercepts a rust wall. It worked well, but sometimes it messed up. Then I found this DELUXE version, with guides that pop away while you apply the paint and therefore avoided messes. It was flawless! They were very inexpensive, and you can buy refill brushes.
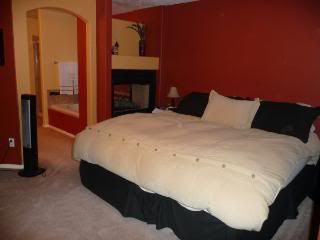
Here are pictures of the finished product. Our bedroom furniture is older than me, but we are about to order some new furniture, which will really make the room look great!
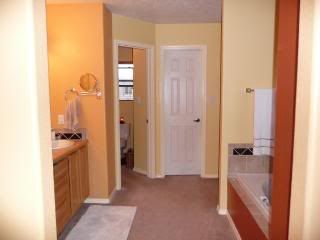
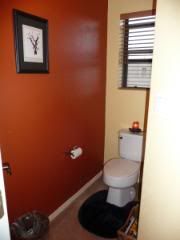
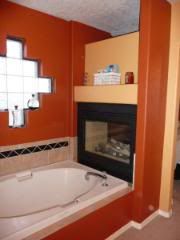
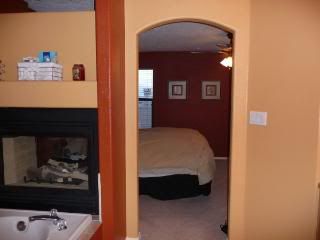
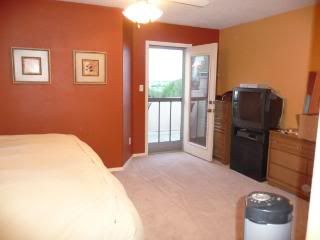
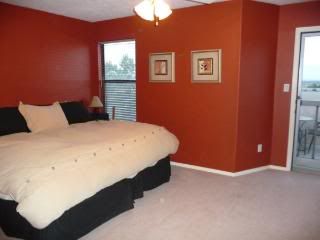
1. rounded corners, which makes changing colors hard because you have to create a clean line somehow.
2. lots of weird little walls and surfaces, requiring triple the detail work
3. one open space, so we used the same colors, but we needed both semigloss and eggshell versions, which meant we were working with lots and lots of buckets
4. Mark had never painted anything before in his life
The colors we used were by Behr, and they are "Firebrick" (rust), "Caramel sundae" (tan) and "Warm cocoon" (yellow/creamy color)
First, here is what I'm talking about with the bullnose corners. I wanted to change colors here, but there was no good stop point. What I did was tape a line and paint the first color. I tried to seal the tape as much as possible. I found that if you take a hard object like a flathead screwdriver and really run it over the edge of the tape, it helps get it in the nooks and crannies. Then I painted color No. 1. Later, after that dried, I taped over it and painted color No. 2. When the tape came off, it still bled, like this:

So I then took a brush and color No. 1 and very carefully and with a muy steady hand touched up my line. It came out surprisingly well:

If all else failed, I had planned to order this blending tool.
I also found this edger tool to be a lifesaver. It made great edges in a fraction of the time. It's good for the edge where the wall and the ceiling meet, but also for other places, like where a tan wall intercepts a rust wall. It worked well, but sometimes it messed up. Then I found this DELUXE version, with guides that pop away while you apply the paint and therefore avoided messes. It was flawless! They were very inexpensive, and you can buy refill brushes.
Here are pictures of the finished product. Our bedroom furniture is older than me, but we are about to order some new furniture, which will really make the room look great!


Thursday, August 14, 2008
The Neverending Job -- kind of like "The Neverending Story," but without a cute luck dragon
I've been busy. Very busy. You see, we finally decided to have our house painted inside. We still had the original, boring, white paint. And plenty of scuffs to go with it.
We bought lots and lots of paint with a rebate special at Home Depot. Then we hired a guy named "Snake" to do the painting at a reasonable rate. You will probably not be surprised when I tell you that hiring a guy covered in tattoos and named Snake was not a good idea. He was, well, a laid-back kind of guy. As in, why show up for scheduled painting days or consultations? What's the big deal in having someone move all their furniture and everything and then not show up? Can't people just sleep in the hall until whenever you can show up?
Well, because our bedroom was an unusable disaster, I decided we'd paint it ourselves. And we've been doing so for days now. We just finished the bedroom and are moving on to the bathroom today. I've just been doing what I can before work every day. It's probably the hardest part of the house because our bedroom/master bath have a lot weird little angled walls -- basically, it's far from a nice square. So far, though, it's just such a great difference!
Photos to come ...
We bought lots and lots of paint with a rebate special at Home Depot. Then we hired a guy named "Snake" to do the painting at a reasonable rate. You will probably not be surprised when I tell you that hiring a guy covered in tattoos and named Snake was not a good idea. He was, well, a laid-back kind of guy. As in, why show up for scheduled painting days or consultations? What's the big deal in having someone move all their furniture and everything and then not show up? Can't people just sleep in the hall until whenever you can show up?
Well, because our bedroom was an unusable disaster, I decided we'd paint it ourselves. And we've been doing so for days now. We just finished the bedroom and are moving on to the bathroom today. I've just been doing what I can before work every day. It's probably the hardest part of the house because our bedroom/master bath have a lot weird little angled walls -- basically, it's far from a nice square. So far, though, it's just such a great difference!
Photos to come ...
Friday, July 25, 2008
Socks and paint
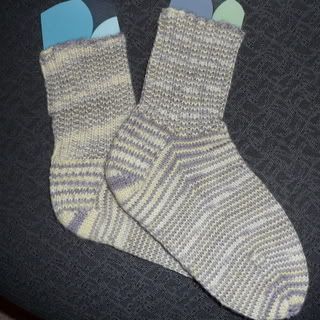
I finished my first pair of socks. They are quite ugly, thanks to the yarn I chose, but I was determined to see them through.
Here they are on my new, homemade sock blockers. You dampen the socks and let them dry on the blockers for optimum shape-age.
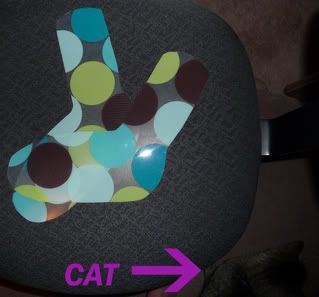
I made these blockers with a $2 plastic place mat, saving myself a good $20-$30. I used the instructions found at Little Sesame Knits, but I was lazy and took shortcuts. Notice my cat is a running theme in these photos. She is everywhere it all times.
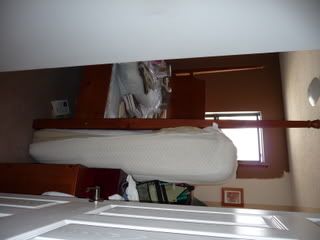
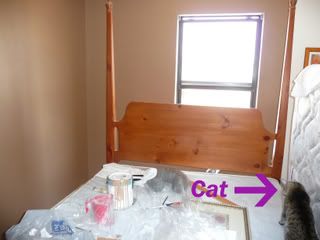
The other thing I did this weekend (my weekend, which does not coincide with everybody else's) was paint one of the spare bedrooms. It was really hard for several reasons, one of which is that painting is really hard. People act like it's fun, but there is not one fun thing about it. Another reason it was hard was because it was like 100% humidity the last few days here, and therefore the swamp coolers are rather ineffective. I'm not one to exaggerate, but I think it was hundreds of degrees in there. The final reason it was so hard is because it's a smallish room with BIG furniture. So it was kind of like a puzzle to move it a little this way and a little that way while I painted. Here is an example of the mess. In order for a small lady to move that big ol' bed, I had to take the mattress off.:
(another kitty)
In a few days, I'll present before and after pics! Stay tuned.
Here they are on my new, homemade sock blockers. You dampen the socks and let them dry on the blockers for optimum shape-age.

I made these blockers with a $2 plastic place mat, saving myself a good $20-$30. I used the instructions found at Little Sesame Knits, but I was lazy and took shortcuts. Notice my cat is a running theme in these photos. She is everywhere it all times.

The other thing I did this weekend (my weekend, which does not coincide with everybody else's) was paint one of the spare bedrooms. It was really hard for several reasons, one of which is that painting is really hard. People act like it's fun, but there is not one fun thing about it. Another reason it was hard was because it was like 100% humidity the last few days here, and therefore the swamp coolers are rather ineffective. I'm not one to exaggerate, but I think it was hundreds of degrees in there. The final reason it was so hard is because it's a smallish room with BIG furniture. So it was kind of like a puzzle to move it a little this way and a little that way while I painted. Here is an example of the mess. In order for a small lady to move that big ol' bed, I had to take the mattress off.:

(another kitty)

In a few days, I'll present before and after pics! Stay tuned.
Subscribe to:
Posts (Atom)