

Tuesday, August 19, 2008
What does she think?
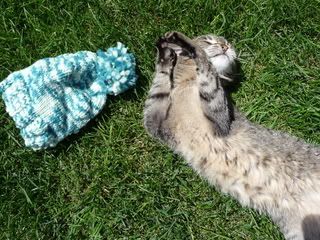
I finished the pom-pom on my "hat for some kid," and I can't tell if Roady approves.
Sunday, August 17, 2008
Things I've been working on
Aside from painting like a madwoman, I have been doing some knitting projects. I have bought a few yarns, but also wanted to use up some of my stash.
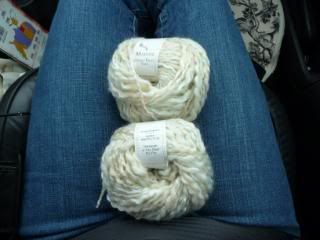
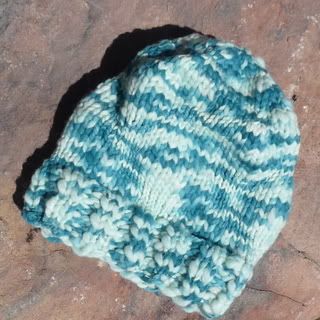
This yarn I bought at Oodles in Santa Fe. I wish you could see in the photo, but it's an ivory yarn with painted on shimmery beige and shimmery ice blue. It's a thick/thin yarn that adds lots of texture. This hat is for me, in an attempt to not hate the winter so much and maybe be a little warmer. I think it will look nice with my wool winter white coat.
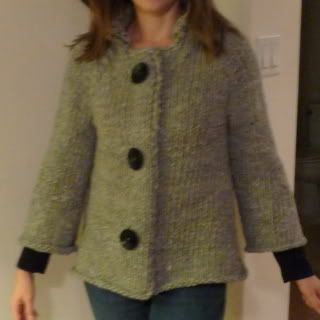
I finally finished my A-Line Jacket from "Runway Knits." Unfortunately, when I finally got around to having Mark take a photo, it was the middle of the night and we forgot the flash. I will get a better picture later. It came out pretty nice. It's definitely wearable, but there are some places where I think it looks sloppy.
I've been working on these socks with yarn that I dyed. They are actually almost done. This is an old photo. I have done the entire foot of each and am working on the leg. They were going to be footies, but I had so much yarn left, and since they are toe-up socks, I just decided to keep going.
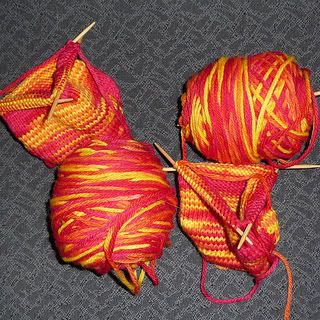
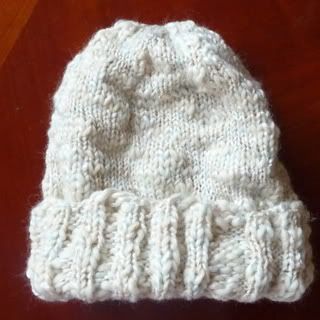
I made this hat for one of my nieces or nephews, whomever it fits best. It's a thick/thin yarn I dyed myself. I plan to add a pom-pom to the top with the remaining yarn.
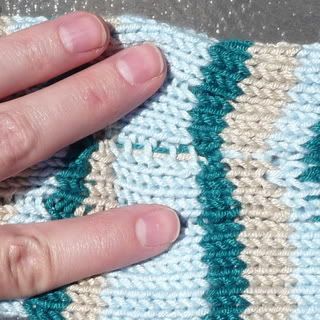
Finally, I'm also working on these socks made in a soft bamboo/merino yarn. I'm making stripes and it's my first time using multiple yarns (many sock yarns are dyed to stripe on their own so you don't have to actually switch yarns).

I was having trouble changing yarns. At first I was cutting the yarn and joining new yarn each time, but I quickly saw that I'd have about 200 ends to sew up after the sock was done. I was advised to "carry" the yarn up as I go, meaning to bring the yarns I am not using along the inside until I need them, kind of looping as I go. Once I started doing this, I found I had a really obvious string of yarn up the beginning of the rounds:
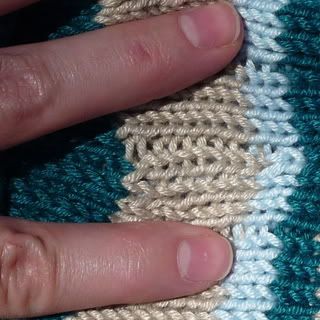
It looks pretty bad. So then I started really making sure I was carrying it along the inside of the sock and not the outside. I also started crossing it with my working yarn on the second stitch of the round, and not the first. This helps because sometimes the first stitch as you switch needles is looser anyway, and also because it packs it in behind several knit stitches in a row, which seems to hide it better:
This yarn I bought at Oodles in Santa Fe. I wish you could see in the photo, but it's an ivory yarn with painted on shimmery beige and shimmery ice blue. It's a thick/thin yarn that adds lots of texture. This hat is for me, in an attempt to not hate the winter so much and maybe be a little warmer. I think it will look nice with my wool winter white coat.


I finally finished my A-Line Jacket from "Runway Knits." Unfortunately, when I finally got around to having Mark take a photo, it was the middle of the night and we forgot the flash. I will get a better picture later. It came out pretty nice. It's definitely wearable, but there are some places where I think it looks sloppy.

I've been working on these socks with yarn that I dyed. They are actually almost done. This is an old photo. I have done the entire foot of each and am working on the leg. They were going to be footies, but I had so much yarn left, and since they are toe-up socks, I just decided to keep going.

I made this hat for one of my nieces or nephews, whomever it fits best. It's a thick/thin yarn I dyed myself. I plan to add a pom-pom to the top with the remaining yarn.

Finally, I'm also working on these socks made in a soft bamboo/merino yarn. I'm making stripes and it's my first time using multiple yarns (many sock yarns are dyed to stripe on their own so you don't have to actually switch yarns).

I was having trouble changing yarns. At first I was cutting the yarn and joining new yarn each time, but I quickly saw that I'd have about 200 ends to sew up after the sock was done. I was advised to "carry" the yarn up as I go, meaning to bring the yarns I am not using along the inside until I need them, kind of looping as I go. Once I started doing this, I found I had a really obvious string of yarn up the beginning of the rounds:

It looks pretty bad. So then I started really making sure I was carrying it along the inside of the sock and not the outside. I also started crossing it with my working yarn on the second stitch of the round, and not the first. This helps because sometimes the first stitch as you switch needles is looser anyway, and also because it packs it in behind several knit stitches in a row, which seems to hide it better:

Friday, August 15, 2008
5 ... long ... days ... later
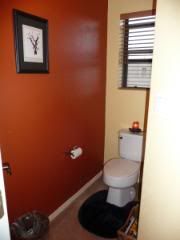
We finally finished painting the master bedroom and bathroom. It took five days, but I love how it came out. Reasons it sucked to paint this area of the house:
1. rounded corners, which makes changing colors hard because you have to create a clean line somehow.
2. lots of weird little walls and surfaces, requiring triple the detail work
3. one open space, so we used the same colors, but we needed both semigloss and eggshell versions, which meant we were working with lots and lots of buckets
4. Mark had never painted anything before in his life
The colors we used were by Behr, and they are "Firebrick" (rust), "Caramel sundae" (tan) and "Warm cocoon" (yellow/creamy color)
First, here is what I'm talking about with the bullnose corners. I wanted to change colors here, but there was no good stop point. What I did was tape a line and paint the first color. I tried to seal the tape as much as possible. I found that if you take a hard object like a flathead screwdriver and really run it over the edge of the tape, it helps get it in the nooks and crannies. Then I painted color No. 1. Later, after that dried, I taped over it and painted color No. 2. When the tape came off, it still bled, like this:
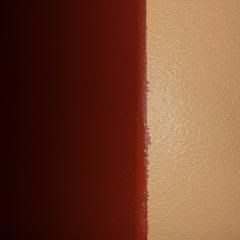
So I then took a brush and color No. 1 and very carefully and with a muy steady hand touched up my line. It came out surprisingly well:

If all else failed, I had planned to order this blending tool.
I also found this edger tool to be a lifesaver. It made great edges in a fraction of the time. It's good for the edge where the wall and the ceiling meet, but also for other places, like where a tan wall intercepts a rust wall. It worked well, but sometimes it messed up. Then I found this DELUXE version, with guides that pop away while you apply the paint and therefore avoided messes. It was flawless! They were very inexpensive, and you can buy refill brushes.
Here are pictures of the finished product. Our bedroom furniture is older than me, but we are about to order some new furniture, which will really make the room look great!


Thursday, August 14, 2008
The Neverending Job -- kind of like "The Neverending Story," but without a cute luck dragon
I've been busy. Very busy. You see, we finally decided to have our house painted inside. We still had the original, boring, white paint. And plenty of scuffs to go with it.
We bought lots and lots of paint with a rebate special at Home Depot. Then we hired a guy named "Snake" to do the painting at a reasonable rate. You will probably not be surprised when I tell you that hiring a guy covered in tattoos and named Snake was not a good idea. He was, well, a laid-back kind of guy. As in, why show up for scheduled painting days or consultations? What's the big deal in having someone move all their furniture and everything and then not show up? Can't people just sleep in the hall until whenever you can show up?
Well, because our bedroom was an unusable disaster, I decided we'd paint it ourselves. And we've been doing so for days now. We just finished the bedroom and are moving on to the bathroom today. I've just been doing what I can before work every day. It's probably the hardest part of the house because our bedroom/master bath have a lot weird little angled walls -- basically, it's far from a nice square. So far, though, it's just such a great difference!
Photos to come ...
Friday, August 8, 2008
Zippered bag tutorial
Click here for pdf version of this tutorial
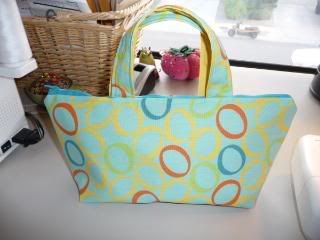
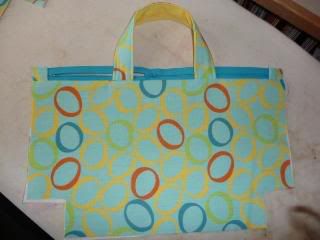
Because someone asked, here is how to make a lined, zippered bag.
To start: Sorry for my ironing board. It's very water stained and ugly. The pattern pieces would be the same for any bag, from a large tote to a handbag to a cosmetic bag. All that changes are the dimensions. You can make it more rectangular or more square. You can make it two-toned by cutting the pattern and adding seam allowances and using two different fabrics.
What you need: outer fabric, liner fabric, craft-weight fusible interfacing, thread
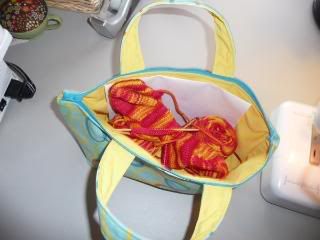
I am making this little bag to carry my knitting in. It looks like a purse, but it's small and has tiny, useless handles. It's basically to keep my knitting in when I throw it into my big work tote. Therefore, it's not perfect, and I don't really care too much. I probably wouldn't have bothered with straps except that I wanted to show how you put them on for the sake of the tutorial.
If you want to do bamboo handles, see bottom for explanation.
To start, you'll need to cut a pattern like this. I have put measurements on here. If it's too small, you should be able to click it and see a bigger version. If that doesn't work, right-click and save it to your computer and then view it. Like I said, just change the dimensions to the sizes you want to make any bag.
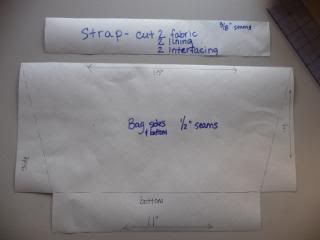
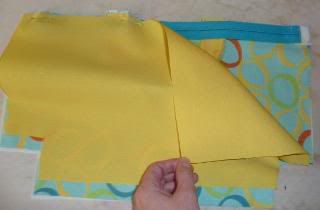
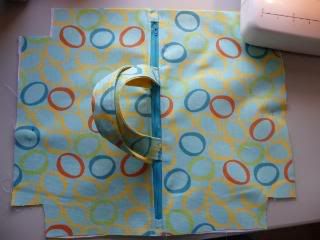
Here are all my pieces cut out: 2 linings (they have damp spots in the pic), 2 outer pieces, 2 interfacing pieces. Same for the straps.
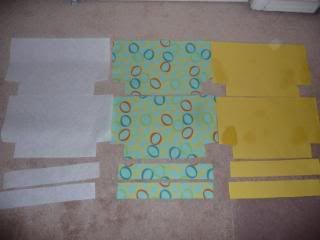
Next, fuse the interfacing to the wrong sides of the outer pieces and outer straps.
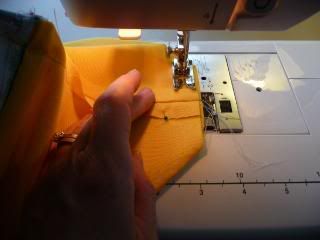
To make the straps, pin right sides of outer and liner straps together (NOTE: if you want to do bamboo handles, see bottom of tutorial for more information for this step):
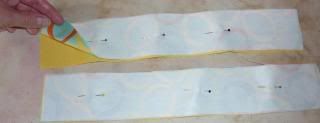
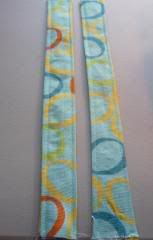
Then sew. I use a 3/8" seam allowance on the straps. Next, turn right side out and press. Then top stitch:
Next, attach the straps to the outer pieces, raw ends and right sides together. Baste. I wouldn't sew on too hard at this point because it's inevitable that the straps will not match up in a future step and you'll have to adjust. But do your best to make them exactly the same on each piece.
Now for the zipper: You want it to be about 2 inches shorter than the top of your bag. I had to trim mine. You'll attach scraps of your main fabric as shown in the photo, sew, then press to the right side. This will help with sewing it up later and make nicer corners.
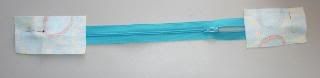
Trim the width of the scraps to the width of the zipper, as show on right side. Don't worry about the length yet.

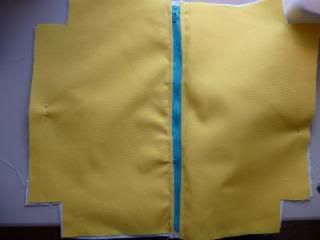
Center the zipper above the main piece top and trim the scraps so the zipper is the same length as the bag. As you see, the scraps on the ends of the zipper have ensured that no zipper is dealt with in the seam allowance when you sew. You'll be sewing over the scraps instead of the zipper.

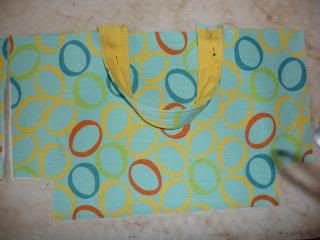
Now sandwich the pieces with the zipper between the outer piece and the lining, with the right side of the zipper facing the right side of the main piece, and the right sides of the lining and main fabric facing, as well. The strap must not be sticking out the top. It will be hidden right now.
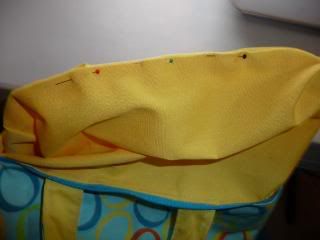
Here, I have sewn through all thicknesses. You may need to start below the zipper pull and sew down, then move the zipper pull and sew the top of the seam. View from outside and view from inside:
Repeat with other side of zipper. It will look like this when it's pinned. THIS IS IMPORTANT: At this point, with it pinned, open it up to the right side and make sure the straps are straight across from each other. They likely won't be, no matter how careful you were earlier with measuring. You may have to remove some of the basting and line them up better. Sew your second "sandwich." Sorry, but once again, the straps may look misaligned and you'll have to remove a bit of stitching and fix them again. This is the most aggravating part to me, but when it's a zippered bag, misaligned straps are obvious when it's closed in a way that it's not when you have an open-top bag.:
After both "sandwiches" are sewn. I have pressed and top stitched the bag along the zipper:
Next, OPEN THE ZIPPER MOST OF THE WAY. THIS IS VERY, VERY IMPORTANT. If you don't, you can't turn it right side out later. Leave it about one inch from all the way open, so the zipper pull doesn't interfere with sewing the sides.
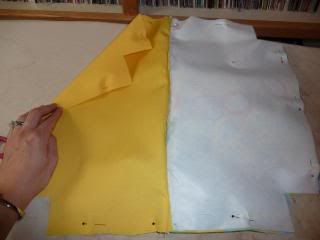
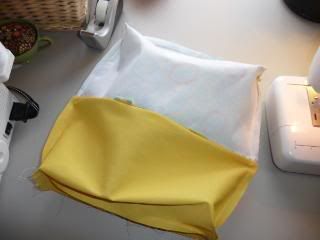
Put outer piece with outer piece and lining with lining and pin right sides of each together:
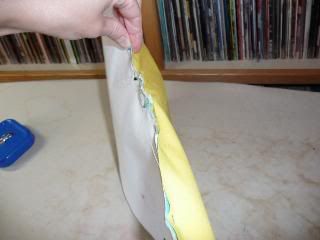
Sew in one continuous seam down each side and sew the bottom of the outer fabric. When you sew the bottom of the lining, leave a large hole to turn the whole thing through later. The cut-out corners remain open.
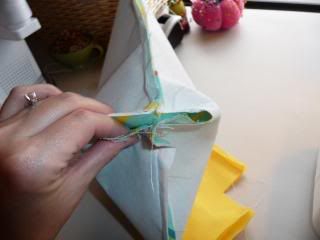
Here's where you sew the corners. This is going to give your bag a flat bottom. It helps to press the seam allowances open. Right now, your bag is flat. Push the cutouts open the other way:

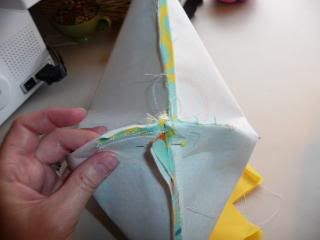
Sew across:
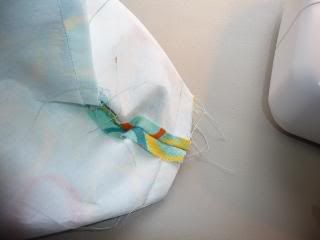
Same for the lining cutouts:
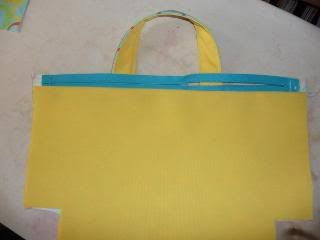
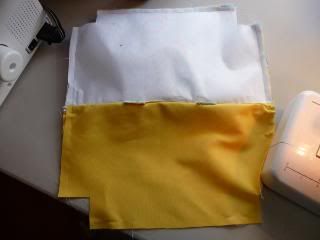
Now your bag is no longer flat. It looks like this, and the only unsewn place around the whole thing is part of the bottom of the lining:
Turn right side out through hole in lining. Reach through and push out corners, especially on edges of zipper. Then turn in raw edges of lining and pin. I just sew mine across with the machine. It's not invisible this way, but it's fast. You can also do a more invisible seam by hand.
Now tuck in your lining and press your bag! Go to the top of this post for the finished product.
FOR BAMBOO HANDLES: Get the kind with brass hardware, not the kind that are bamboo all the way around and form a circle or half-circle. You'll just be attaching loops for the handles during construction. After the entire bag is done, you'll remove the brass hardware from the handles and insert through the loops, then you'll reattach the hardware to the handles.
What I do is take a piece of fabric about 6.25" by 2.25". I fold it in half lengthwise, right sides together. I sew with a small seam allowance and turn right side out. Then I fold it in half lengthwise and cut. I then fold each of those in half the same way and cut again, so I have four tabs. Each tab is folded with raw edges together and sewn on in place of the straps in the tutorial above. Where you put them depends on how wide your handles are. Again, like the straps, be very careful about making them line up.
Because someone asked, here is how to make a lined, zippered bag.
To start: Sorry for my ironing board. It's very water stained and ugly. The pattern pieces would be the same for any bag, from a large tote to a handbag to a cosmetic bag. All that changes are the dimensions. You can make it more rectangular or more square. You can make it two-toned by cutting the pattern and adding seam allowances and using two different fabrics.
What you need: outer fabric, liner fabric, craft-weight fusible interfacing, thread
I am making this little bag to carry my knitting in. It looks like a purse, but it's small and has tiny, useless handles. It's basically to keep my knitting in when I throw it into my big work tote. Therefore, it's not perfect, and I don't really care too much. I probably wouldn't have bothered with straps except that I wanted to show how you put them on for the sake of the tutorial.
If you want to do bamboo handles, see bottom for explanation.


To start, you'll need to cut a pattern like this. I have put measurements on here. If it's too small, you should be able to click it and see a bigger version. If that doesn't work, right-click and save it to your computer and then view it. Like I said, just change the dimensions to the sizes you want to make any bag.

Here are all my pieces cut out: 2 linings (they have damp spots in the pic), 2 outer pieces, 2 interfacing pieces. Same for the straps.

Next, fuse the interfacing to the wrong sides of the outer pieces and outer straps.
To make the straps, pin right sides of outer and liner straps together (NOTE: if you want to do bamboo handles, see bottom of tutorial for more information for this step):

Then sew. I use a 3/8" seam allowance on the straps. Next, turn right side out and press. Then top stitch:

Next, attach the straps to the outer pieces, raw ends and right sides together. Baste. I wouldn't sew on too hard at this point because it's inevitable that the straps will not match up in a future step and you'll have to adjust. But do your best to make them exactly the same on each piece.

Now for the zipper: You want it to be about 2 inches shorter than the top of your bag. I had to trim mine. You'll attach scraps of your main fabric as shown in the photo, sew, then press to the right side. This will help with sewing it up later and make nicer corners.

Trim the width of the scraps to the width of the zipper, as show on right side. Don't worry about the length yet.

Center the zipper above the main piece top and trim the scraps so the zipper is the same length as the bag. As you see, the scraps on the ends of the zipper have ensured that no zipper is dealt with in the seam allowance when you sew. You'll be sewing over the scraps instead of the zipper.

Now sandwich the pieces with the zipper between the outer piece and the lining, with the right side of the zipper facing the right side of the main piece, and the right sides of the lining and main fabric facing, as well. The strap must not be sticking out the top. It will be hidden right now.

Here, I have sewn through all thicknesses. You may need to start below the zipper pull and sew down, then move the zipper pull and sew the top of the seam. View from outside and view from inside:


Repeat with other side of zipper. It will look like this when it's pinned. THIS IS IMPORTANT: At this point, with it pinned, open it up to the right side and make sure the straps are straight across from each other. They likely won't be, no matter how careful you were earlier with measuring. You may have to remove some of the basting and line them up better. Sew your second "sandwich." Sorry, but once again, the straps may look misaligned and you'll have to remove a bit of stitching and fix them again. This is the most aggravating part to me, but when it's a zippered bag, misaligned straps are obvious when it's closed in a way that it's not when you have an open-top bag.:

After both "sandwiches" are sewn. I have pressed and top stitched the bag along the zipper:


Next, OPEN THE ZIPPER MOST OF THE WAY. THIS IS VERY, VERY IMPORTANT. If you don't, you can't turn it right side out later. Leave it about one inch from all the way open, so the zipper pull doesn't interfere with sewing the sides.
Put outer piece with outer piece and lining with lining and pin right sides of each together:

Sew in one continuous seam down each side and sew the bottom of the outer fabric. When you sew the bottom of the lining, leave a large hole to turn the whole thing through later. The cut-out corners remain open.

Here's where you sew the corners. This is going to give your bag a flat bottom. It helps to press the seam allowances open. Right now, your bag is flat. Push the cutouts open the other way:


Sew across:

Same for the lining cutouts:

Now your bag is no longer flat. It looks like this, and the only unsewn place around the whole thing is part of the bottom of the lining:

Turn right side out through hole in lining. Reach through and push out corners, especially on edges of zipper. Then turn in raw edges of lining and pin. I just sew mine across with the machine. It's not invisible this way, but it's fast. You can also do a more invisible seam by hand.

Now tuck in your lining and press your bag! Go to the top of this post for the finished product.
FOR BAMBOO HANDLES: Get the kind with brass hardware, not the kind that are bamboo all the way around and form a circle or half-circle. You'll just be attaching loops for the handles during construction. After the entire bag is done, you'll remove the brass hardware from the handles and insert through the loops, then you'll reattach the hardware to the handles.
What I do is take a piece of fabric about 6.25" by 2.25". I fold it in half lengthwise, right sides together. I sew with a small seam allowance and turn right side out. Then I fold it in half lengthwise and cut. I then fold each of those in half the same way and cut again, so I have four tabs. Each tab is folded with raw edges together and sewn on in place of the straps in the tutorial above. Where you put them depends on how wide your handles are. Again, like the straps, be very careful about making them line up.
Sunday, August 3, 2008
Still in love, after all these years
It was our anniversary on Wednesday, and we took a short, in-state vacation.
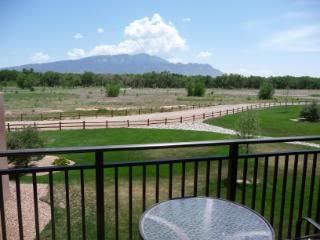
First, we went to the Hyatt Tamaya on the reservation near Bernalillo/Rio Rancho. This is where we stayed on our wedding night. We did the spa thing, hung out at the pool and ate a great dinner.
View from our room
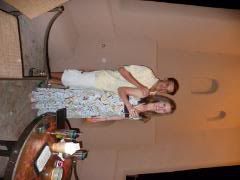
Here I am doing my 'ho impression. I can't recall why.

Random pics

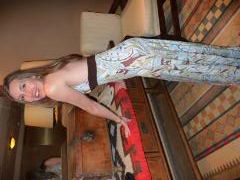
This is a half-way version of my Jerry Springer girl picture. On Jerry Springer, whenever a girl is like, "I'm hot!" and another says, "No you ain't!" and the first one has to prove it, she always shows a picture of her with her butt sticking out and her hands on the wall. I'm not sure what the pictures are supposed to say. But I got embarrassed while doing this in the hotel, so I only partway did it. Did I prove that I'm hot?
A frog
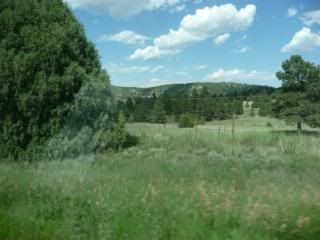
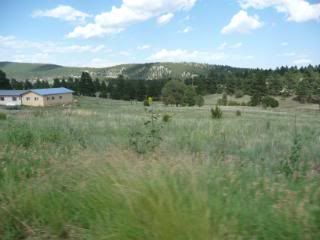
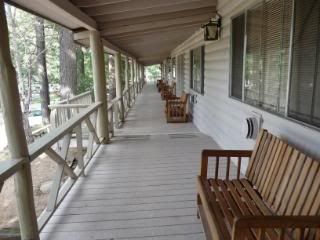
Next, we drove up to Pendaries (PAN-da-ray) up in near Las Vegas, N.M. It's a little golfing place in the mountains, and it's beautiful.

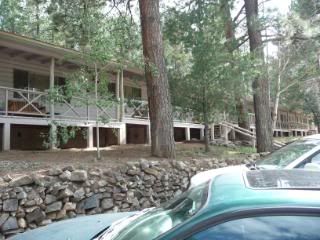
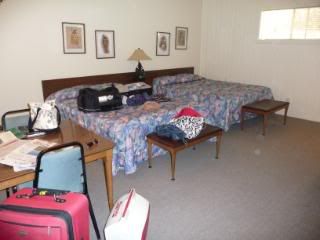
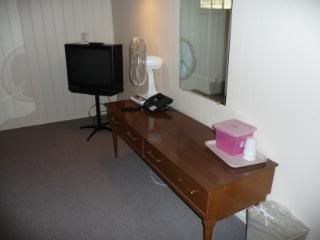
The accommodations leave a bit to be desired, though. The rooms are rather '70s style and very bare bones. No shampoo or hair dryer. You get soap, towels and a fly-swatter. There's no air conditioning, and everyone gets up early and makes lots of clomping on the common front deck. The maids barged in at 8:30 a.m.
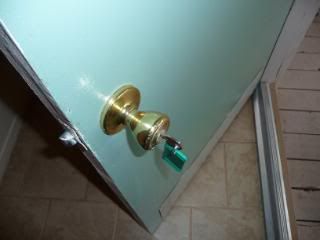
They use real KEYS here!
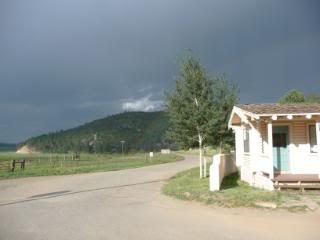
The great thing about Pendaries is that it rains quite a bit. We found the end of a rainbow, and guess what's there!? It's not gold. It's cows! This picture was proof, only you can't really see the rainbow. Or the cows. Phooey. Take my word for it?
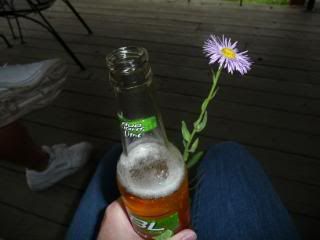
A flower, beer, scenery and my husband. What could be better?!

Mark got me this fancy golf bag

On the way home, we stopped at the golf station in Pendaries, but it had a sign that said, "No gas this year." So we stopped in Las Vegas on the way home, where, by the way, gas is really expensive. We found this place that offers full service called Gabriel's Customer-Oriented Service Station. Full service. We didn't know if we were supposed to tip or what, so we did. The kid was super-nice and seemed sort of surprised by the tip, so maybe we weren't supposed to.

Below Gabriel's Customer-Oriented Service Station's sign, there is this weird cage with Catholic statues trapped inside.

On the way back, as we approached Santa Fe, Mark remembered the Steaksmith restaurant, where they have that rare treat of raspberry pie. I've only ever seen that in Maine, where raspberries grow like weeds everywhere. We get goatheads, they get raspberries. Whatever.
Anyway, we've gone twice, but they always are out of this pie, so I've never got to try it. Mark decided to get me a treat, and I got one! I got one! And I lived happily ever after.
The End.
First, we went to the Hyatt Tamaya on the reservation near Bernalillo/Rio Rancho. This is where we stayed on our wedding night. We did the spa thing, hung out at the pool and ate a great dinner.
View from our room

Here I am doing my 'ho impression. I can't recall why.

Random pics


This is a half-way version of my Jerry Springer girl picture. On Jerry Springer, whenever a girl is like, "I'm hot!" and another says, "No you ain't!" and the first one has to prove it, she always shows a picture of her with her butt sticking out and her hands on the wall. I'm not sure what the pictures are supposed to say. But I got embarrassed while doing this in the hotel, so I only partway did it. Did I prove that I'm hot?

A frog

Next, we drove up to Pendaries (PAN-da-ray) up in near Las Vegas, N.M. It's a little golfing place in the mountains, and it's beautiful.


The accommodations leave a bit to be desired, though. The rooms are rather '70s style and very bare bones. No shampoo or hair dryer. You get soap, towels and a fly-swatter. There's no air conditioning, and everyone gets up early and makes lots of clomping on the common front deck. The maids barged in at 8:30 a.m.


They use real KEYS here!

The great thing about Pendaries is that it rains quite a bit. We found the end of a rainbow, and guess what's there!? It's not gold. It's cows! This picture was proof, only you can't really see the rainbow. Or the cows. Phooey. Take my word for it?

A flower, beer, scenery and my husband. What could be better?!


Mark got me this fancy golf bag


On the way home, we stopped at the golf station in Pendaries, but it had a sign that said, "No gas this year." So we stopped in Las Vegas on the way home, where, by the way, gas is really expensive. We found this place that offers full service called Gabriel's Customer-Oriented Service Station. Full service. We didn't know if we were supposed to tip or what, so we did. The kid was super-nice and seemed sort of surprised by the tip, so maybe we weren't supposed to.

Below Gabriel's Customer-Oriented Service Station's sign, there is this weird cage with Catholic statues trapped inside.

On the way back, as we approached Santa Fe, Mark remembered the Steaksmith restaurant, where they have that rare treat of raspberry pie. I've only ever seen that in Maine, where raspberries grow like weeds everywhere. We get goatheads, they get raspberries. Whatever.
Anyway, we've gone twice, but they always are out of this pie, so I've never got to try it. Mark decided to get me a treat, and I got one! I got one! And I lived happily ever after.
The End.
Subscribe to:
Posts (Atom)